...
| Info |
|---|
To make any change permanent always press Save before leaving the page. |
Deleting a site
To delete a site do the following:
- Go to Organization → Locations.
- Click Edit on the location to be deleted.
- Uncheck the Enabled check box.
- A Delete button will appear. Click it.
- Confirm that the site can be deleted.
| Info |
|---|
If only the Enabled checkbox is unchecked, the site will still be on the system, but it will not be shown nor it will be processing more incoming data. To show it on the locations page, just uncheck the Enabled button on the list. |
User Management
The User Management page allows the Administrator to create, delete and edit all users of the system. It can be reached in Organization → Users.
...
Location Structure Edition
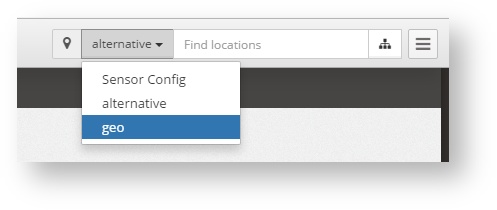
The locations tree structure shows all the locations in a predefined structure. This has to be defined by the administrator. The can be as many location trees as wanted. The user can choose which to use by selecting it:
To open the tree click the tree button left of the search box;
To create, delete and manage the Location Structure, go to Organization → Location Structure
Creating a new Location Tree
- A new tree can be added clicking the +Add button. A tree will be created will the date as name.
- Click on the name (in blue) to edit it and change it.
- Once changed click Save.
Editing the Location Tree
The Location Tree has a hierarchical structure of up to 5 levels: Country, Region 1, Region 2, City and Location. It needs to have at least two levels: The Location and an upper lever.
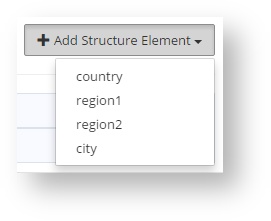
To add the upper levels, click +Add Structure Element. It will show all the options:
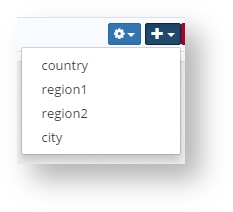
A new level can also be created using the + button on an existing element. The new one will be placed under it if it is of a lower level. The new element can be then edited. The name will be empty, but can be changed just by clicking on it.
For each element the following can be done:
- Move the item around using Drag And Drop, dragging from the left end of the item
- Expand or Contract the lower levels
- Select the country flag (only for countries). Use the two letter country code (ISO 3166-1 alpha-2). After putting the two letter code and saving the proper flag will be shown.
- Change the item name. Can be edited by clicking on it.
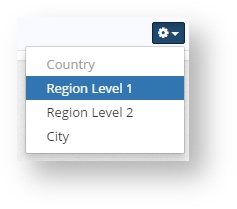
- Change the element level.
- Add a new element.
- Delete the current element
Once the upper levels are in place, the locations can be placed in under the right element. To do that just drag and drop the location to the correct place. Drag by the symbol at the left end of the location.
External API
In this page is the external API to connect to third party software is enabled. Just select the parts of the API that need to be enabled. They will be activated immediately and the options saved.
...


