| Table of Contents |
|---|
Introduction
This guide is intended to help you through the migration process from SONARPLEX Version 4.1.x and 4.2.x to SONARPLEX release 5.1. SONARPLEX Generation 5 is a major release, and contains essential changes of the software especially for the plugins. This requires from the user additional steps in the upgrade procedure.
...
Plugin Migration
| Info |
|---|
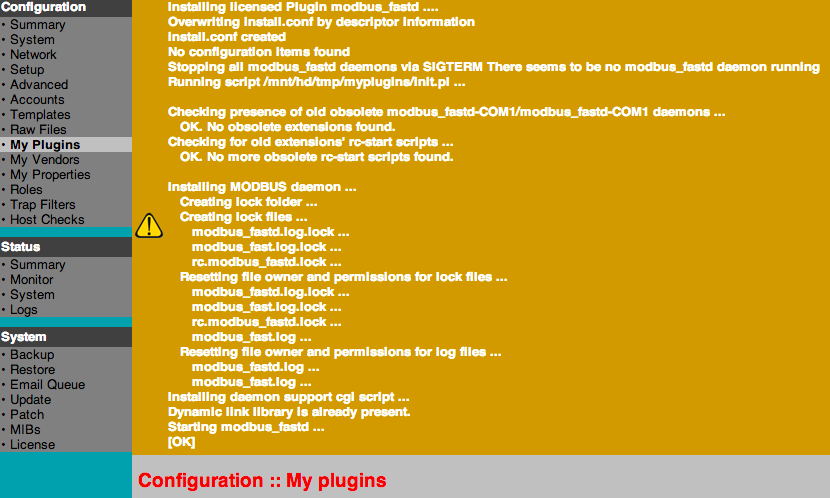
Note that most of the plugins will show up Installation problems(s) (see screenshot above) in Admin GUI > My Plugins, this is normal as you now must now upgrade the plugins for compatibility. |
Follow one of the below described ways, automatic or manual, to update all plugins.
Automatic Plugin Update (recommended)
As most of the plugins are not compatible between SONARPLEX 4.x.x and 5.x.x, these must be updated. We highly recommend to use the upgrade patch (TODO: name here) as it will upgrade the plugins automatically.
| Info |
|---|
You can find the plugin update, named plugin-updates-001_v4.2.0b_to_v5.1.1a.tar in the azeti Portal > Downloads > SONARPLEX Generation 5 > Updates |
After the download you must install the plugin updates package:
- Choose Admin GUI > System > Patch
- Choose Browse to select the proper patch file and elect the apply icon to start the installation, the SONARPLEX will reboot which can take up to 10 minutes
...
| Info |
|---|
In case you are using old MODBUS daemons, right click on you appliance and choose "Manage Plugins" and deinstall modbus_fastd-COM1.azse and modbus_fastd-COM2.azse. To do this, uncheck all other plugins, mark the "Remove" tick of the mod_bus_fastd-COM1 and COM2, and modbus_setup, and press apply. See the screenshot above. |
Now install the MODBUS daemon version (tick it an press Apply).
All further plugins for update must now be selected and installed. Check all the new plugins and press Apply.
The old plugins "Modbus Fast Write Plug-In for fast MODBUS daemon", modbus_fastd-COM1 and -COM2, the new modbus_fastd and the modbus_active_to_passive_converter must be left unchecked.
Install the configuration migration plugin modbus_active_to_passive_converter which will run immediately after installation and update all necessary monitoring configuration items.
| Info |
|---|
Now please close the Plugin Management and reopen to load the latest installation state. |
As the converter package is only required once you can now remove it, choose Remove, and Apply.
You now have updated all MODBUS plugins and you can close the Plugin Management.
Updating Plugins
viawith the Administrative Interface
Remove the old MODBUS-Daemons
If you are using Modbus deinstall modbus_fastd-COM1.azse, modbus_fastd-COM2.azse and modbus_setup:
- click on the triangle to expand the Plugin page
- click on the bin "Delete plugin" icon and confirm to deinstall it
- Open Configuration > My Plugins
- Click the arrow to expand the plugin information for both daemons
- Delete the addon by selecting the trash can icon , repeat this for both the COM1 and COM2 daemon
Install the new MODBUS-Daemons
Install the new Modbus daemon, modbus_fastd.azse:
- Click browse Open Configuration > My Plugins
- Choose Browse to select modbus_fastd.azse
- Click on uploadWait for "install -ok" upload
Update incompatible Plugins
Incompatible/obsolete plugins are marked in red color and require a new version. Do following steps for all red marked plugins:
- Click browse to Open Configuration > My Plugins
- Choose Browse to select the new plugin
- Click on upload
- Wait for "install -ok"
- on upload and check if the installation notes show OK
Migrate the MODBUS Plugins
If you are using Modbus install MODBUS migration Plugin:
- Click browse to select the plugin Open Configuration > My Plugins
- Choose Browse to select modbus_active_to_passive_converter.azse
- Click on upload
- wait some seconds and press F5 to refresh your Web browser (this is because of a software bug)
- on upload and check if the installation notes show OK
For cleaning up your appliance delete check_modbus_fast_write3.azsp and modbus_active_to_passive_converter.azse:
- click on the triangle to expand the Plugin page
- click on the bin "Delete plugin" icon and confirm to deinstall it
Done!
At the end the MyPlugins page should look like this:
, repeat the following steps for both
- Open Configuration > My Plugins
- Click the arrow to expand the plugin information
- Delete the addon by selecting the trash can icon
| Info |
|---|
You can verify if the installation was successful when service check plugins which are used by any service are marked green. |
Configuration changes after upgrade
The new release introduced a whole new logging framework which allows a detailed logging configuration for single system components.
| Info |
|---|
|
Downgrade to SONARPLEX 4.x.x
Following instruction guides you to perform a downgrade from SONARPLEX generation 5 to the previous version 4.x.x. Similar as for the upgrade you need to follow the upgrade path in the reverse direction. This means if you want to go to release 4.1.3 you need to install 4.2.0 first as an intermediate step.
| Info |
|---|
The next steps are an example how to downgrade from SONARPLEX version 5.1.0 to version 4.1.3 with installed patch level 53 |
Preparations
- you need the two upgrade images SONARPLEX version 4.2.0 and 4.1.3
- you need the last patch for SONARPLEX version 4.1.3 update-4.1.3a-enhance-53-ir.tar
- you need a backup created in SONARPLEX version 4.1.3
- you need the downgrade patch update-4.1.3a-down-1.tar
...


